


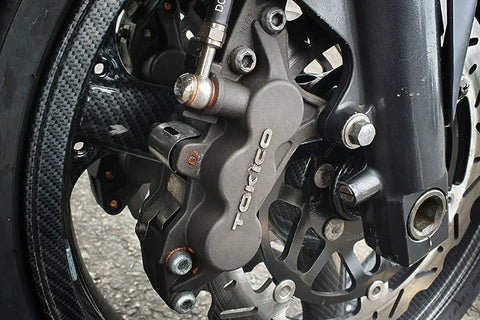
It's always good when your bike stops when you squeeze the brakes. Fortunately, a motorcycle brake calliper repair is one of the most economical insurance plans for good brake maintenance. Bikes are just not designed to survive rain or road salt, and many riders are unaware that one or more of their calliper pistons have seized - until it's too late.
A brake rebuild is completely disassembling and inspecting/cleaning your brakes before rebuilding them with new seals, whilst a refurbishment entails stripping the castings to bare metal, recoating, and oven drying before reassembly - to ensure they appear flawless.
So how do you rebuild a caliper?
It is critical to keep your calipers clean, but you should also clean and lubricate the pistons on a regular basis. To do so, just unbolt the caliper and slide it off the disc, rather than pushing the pads back into the caliper. After that, you may remove the pads and clean the pistons. Check to see whether the pads are in excellent shape and have plenty of life remaining in them.
Using brake cleaner, clean all of the exposed piston and up to the seal, then apply a smear of red rubber grease to the same area. Don’t slather it on as you don’t want it getting on the pad face.
Make sure the pads are returned in the same place as they were taken out, otherwise they will have to bed to the disc again. Then replace any springs and the holding pin / clip (after cleaning them too).
When do you know it's time for this rebuild?
If you take care of the calipers, you should simply rebuild them at the required service intervals - in this example, every two years! If you're looking to buy a bike, you may inspect the calipers by lifting the wheel off the ground and twisting it, feeling and listening for drag. Apply the brakes, then let go to see whether the wheel frees up; if they don't come off cleanly, you'll most likely need to put in some effort.
And what parts do I need?
If your calipers have been well maintained, a rebuild should just require a seal kit. If you're looking for a kit MotoUsher sells one and this could include the following;
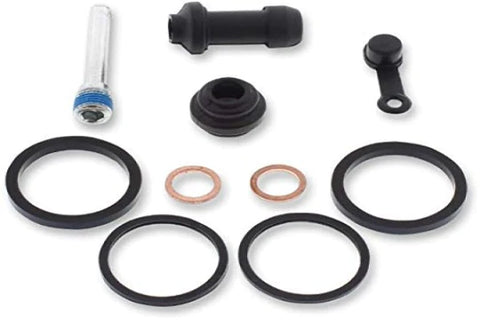
- Wiper seals
- Dust seals
- Caliper joint seals
- Stainless steel bleed nipples
- Bleed nipple covers
- Copper banjo washers
- Red rubber grease
The brake pistons might be corroded, in which case they’ll need to be carefully cleaned with wire wool, but if they’re too badly damaged, they should be replaced.

The steps
Step 1: Drain the fluid and loosen the caliper joining bolts
Step 2: Remove the pistons
Step 3: Remove the seals
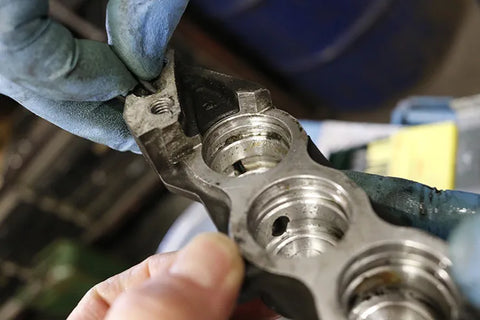
Step 4: Clean gunk out
Step 5: Clean the fluid pathways
Step 6: Clean the seal seats
Step 7: Clean the caliper body faces
Step 8: Thoroughly flush the calipers
Step 9: Fit the new seals and pistons
Step 10: Fit the two sides back together
Step 11: Fit the pads
Step 12: Put the calipers back on the bike
Rebuilding a brake master cylinder
Both the front and rear master cylinders are practically the same - a piston that pumps brake fluid down the lines to the caliper, driving the pistons out to force the brake pads on the disc. The manufacturer will have matched the size of the piston in the cylinder to the calipers depending on the desired sensation.
How to take care of your brake master cylinder
The most essential thing is to change the brake fluid every two years to help avoid internal corrosion. Aside from that, there is usually nothing that has to be done to maintain a brake master cylinder other than keeping the reservoir lid closed and the exterior clean. It is critical that you use the prescribed fluid listed in your bike's owner's handbook. Check the label on the reservoir cap as well. Other than that, keep the brake lever’s pivot pin greased to avoid it getting corroded.
There's little reason why the master cylinder shouldn't survive the lifespan of the bike unless it's damaged in some manner - the calipers are more likely to need repair much before the front or rear master cylinders.
So how do I know when to rebuild the master cylinder?
If you pull the brake lever (or push down on it in the case of the rear) and it feels graunchy, the lever pivot pin is most likely rusted; it should be replaced, but if it's not substantially damaged, you may clean it up and oil it.
Another explanation for a harsh sensation to the lever (or pedal) is that the braking fluid has absorbed water and must be replaced.
If the brakes won't hold pressure, causing the lever to pull back to the bar (or the pedal to drop to the bottom) - however slowly - the seals in the master cylinder may be worn or broken.
How to rebuild a brake master cylinder?
Step 1: Remove the master cylinder
Step 2: Remove the rubber boot
Step 3: Remove the circlip
Step 4: Take out the piston and spring
Step 5: Check and clean the cylinder
Step 6: Fit the new seals to the new piston
Step 7: Fit the new spring
Step 8: Insert the spring and piston assembly
Step 9: Fit a new circlip
Step 10: Fit the boot
Step 11: Fit the cylinder back onto the bike
Step 12: Fill with new fluid and bleed the system
Comments