


Any four-stroke engine's motorcycle valve mechanism is fairly simple, both conceptually and practically. In essence, valves serve as the combustion chamber's doors, opening during the intake stroke to let new mix in, closing during the compression and power strokes to keep out air, and opening during the exhaust stroke to let out the wasted gas.
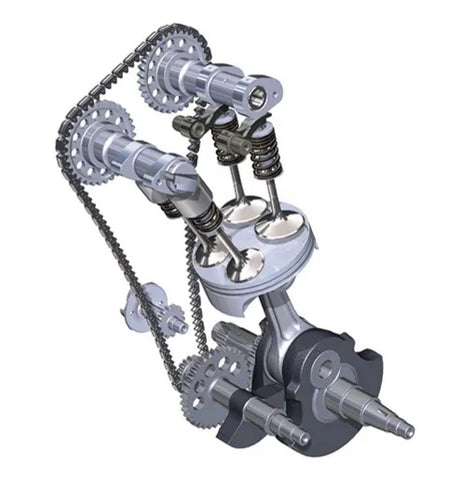
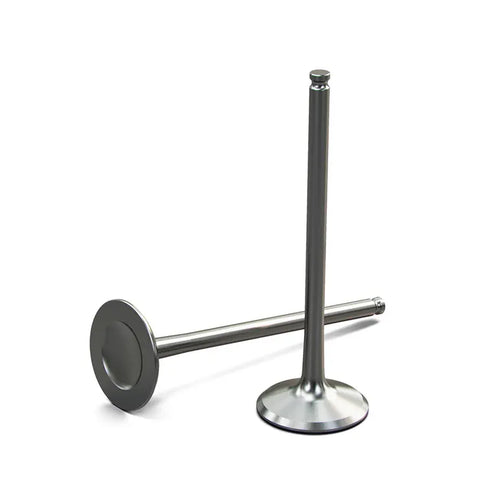
All engines must have at least two valves per cylinder, one for the intake of a fuel-air mixture and one for the exhaustion of air and any unburned fuel following the combustion stroke. Your engine's seal while the valve is closed is also crucial. The valve needs the right amount of clearance in order to seal off the engine cylinder when it is closed.
High engine speeds put a lot of strain on your valves. It's not unusual for bikes to spend the bulk of their lives operating at 4,000 rpm, especially those with performance engines. The intake and exhaust valves each open and close 2000 times per minute at a comparatively low engine speed of 4,000 rpm. 33 times every second, roughly. Additionally, because valves are frequently exposed to high temperatures, they will expand as they get hot and contract as they cool. These heat cycles put the valve under more strain and shorten its lifespan. Additionally, the valve's clearance will decrease as the engine temperature rises.
So what is valve clearance and how do you check it?
The space between the top of the valve and the rocker arm is referred to as valve clearance. The rocker arm will experience force as the camshaft rotates. When the rocker arm pivots downward, the valve will be pushed open. When the cam is not forcing the rocker arm down, the valve clearance is the distance between the top of the valve and the rocker arm.
In other words, you should only check valve clearance on a closed valve because there shouldn't be any space when the valve is opened. Only measure valve clearance when the engine is cool; measurements taken on a hot or recently run engine will not be precise.
Let's speak about the indicators your motorcycle will give you when it's time to adjust the valves now that we have a basic understanding of valve clearances.
The most typical way for out-of-adjustment or loose valves to be detected is by a distinct clatter coming from the valve region. Generally, loose valves occur due to normal physical wear between the components. Less trouble is caused by loose valves, but if they are extremely loose, the valve stem and its adjuster may sustain mechanical damage. In addition to making a lot of noise, loose valves frequently pound against one another and the other valve train parts, hastening wear.
Tight valves may result in difficult starting or a poor idle. Several undesirable things happen if the valve clearance is decreased more than is reasonable. First, a small adjustment to the valve timing may have an impact on outputs of performance and emissions. However, there is an additional difficulty: The exhaust valve continues to function because, while sitting on its seat, it can pass a sizeable amount of the heat it collects from the combustion process directly into the cylinder head. The valves spend less time on their seats as clearance is lowered. As a result, the exhaust valves have less time to release heat, which can result in a variety of problems, including pre-ignition, detonation, and engine overheating as well as warped or burned valves.
Adjusting Valves
There are three fundamental ways to change valve clearance. The screw adjuster is the most basic and popular. It has been around for a while and is perfectly functional. Shimming the valves is method number two. Typically, a bucket-shaped tappet or lifter that is inserted immediately between the cam and the valve stem secures the shims. The hydraulic lifter is the third type of adjuster and typically doesn't need routine maintenance or adjusting.
Adjusting Valve Shims
Shim-adjusted valves come in two main types. The more typical method positions the shim on top of a small inverted bucket. The valve's bucket rests on top of it, covering the valve stem and spring, and the cam engages the shim directly. Shims can typically be removed and replaced when a shim-over-bucket configuration is used without affecting the cams.

The shim-under-bucket style adjustment is less practical. In this configuration, the shim is positioned between the valve stem and the bucket's bottom. Because changing shims requires removing the cams, this system makes adjustment more difficult. Valve clearance tolerances are typically a little more forgiving because shims are only offered in sets of increments.
The main drawback in this situation is that few owners are eager to go out and purchase a box of valve adjustment shims. You'll wind up measuring each and every clearance. If any are incorrect, you must decide which size replacement shim you require and then go to your neighborhood dealer to purchase one from the Valve Shim Kits. Unless you are replacing one that just so happens to be the correct size or you already have one from a previous modification.
Valve adjustments are essential to the health of your engine and should not be neglected. For the long-term health of the engine, they are absolutely important yet neither pleasure to perform nor expensive. To find out how often to change the valves on your bike, consult the owner's manual.
Comments